DISCFIELD / Learn
How to throw a disc golf backhand: step by step for beginners
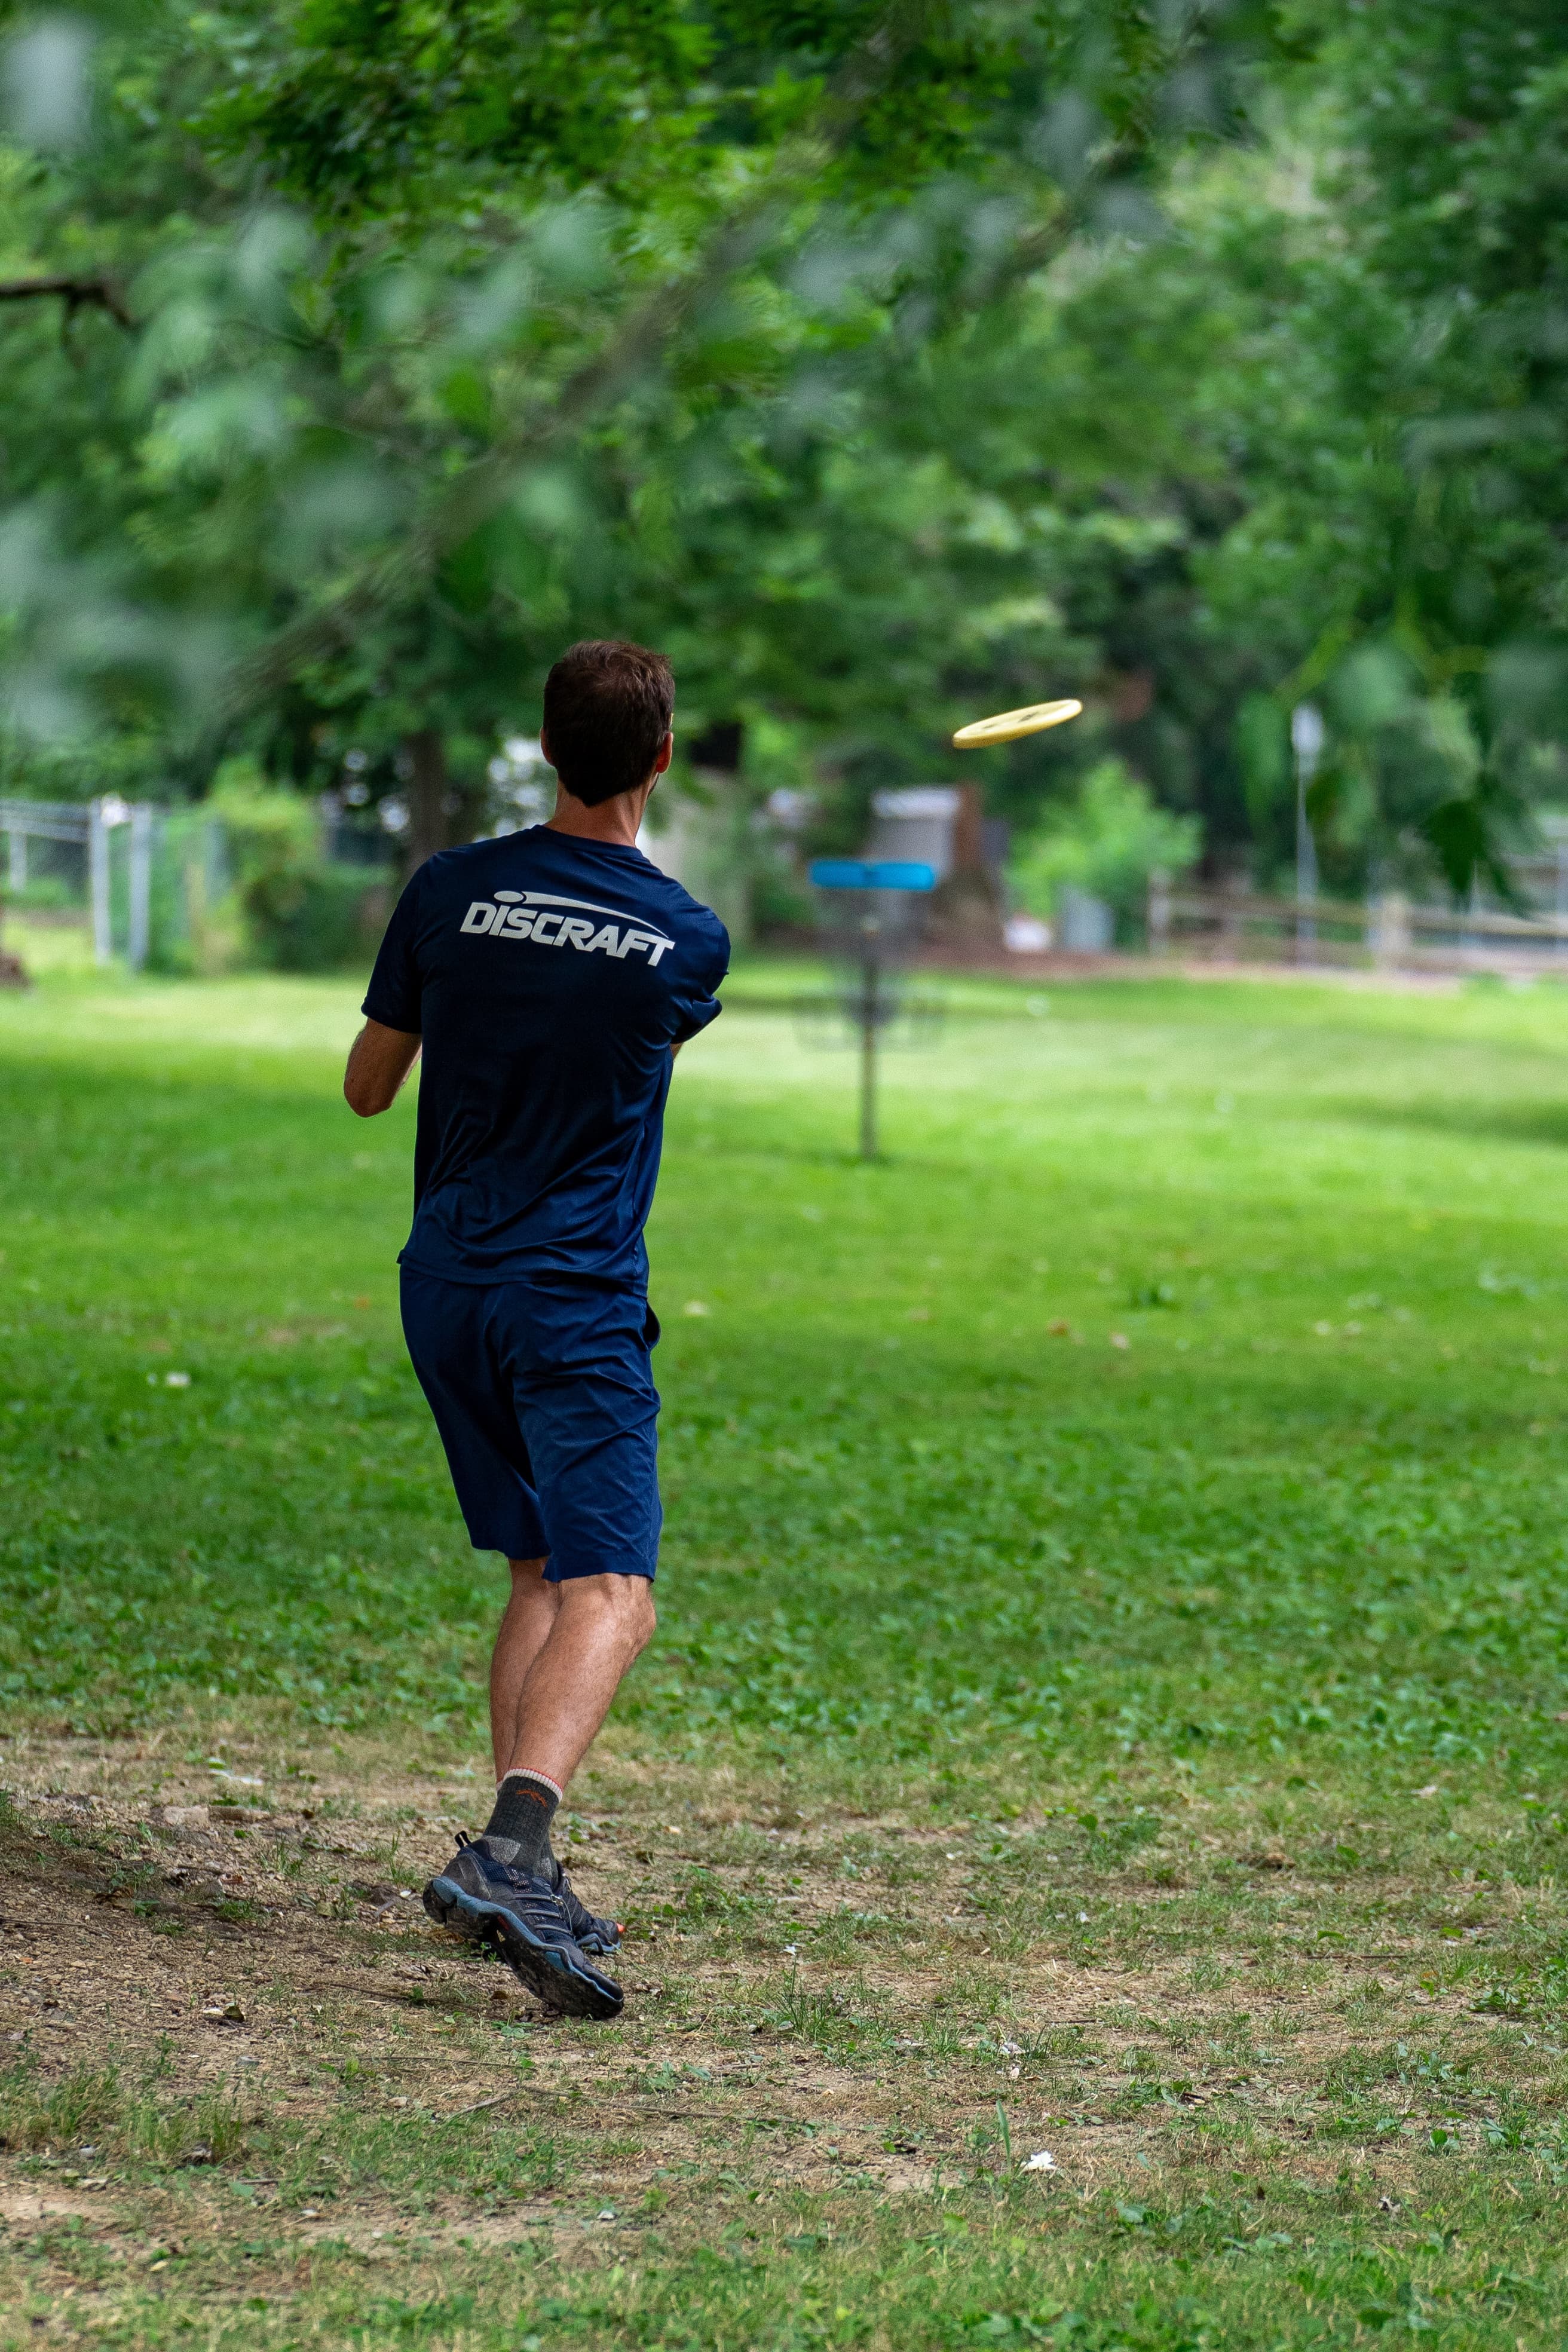
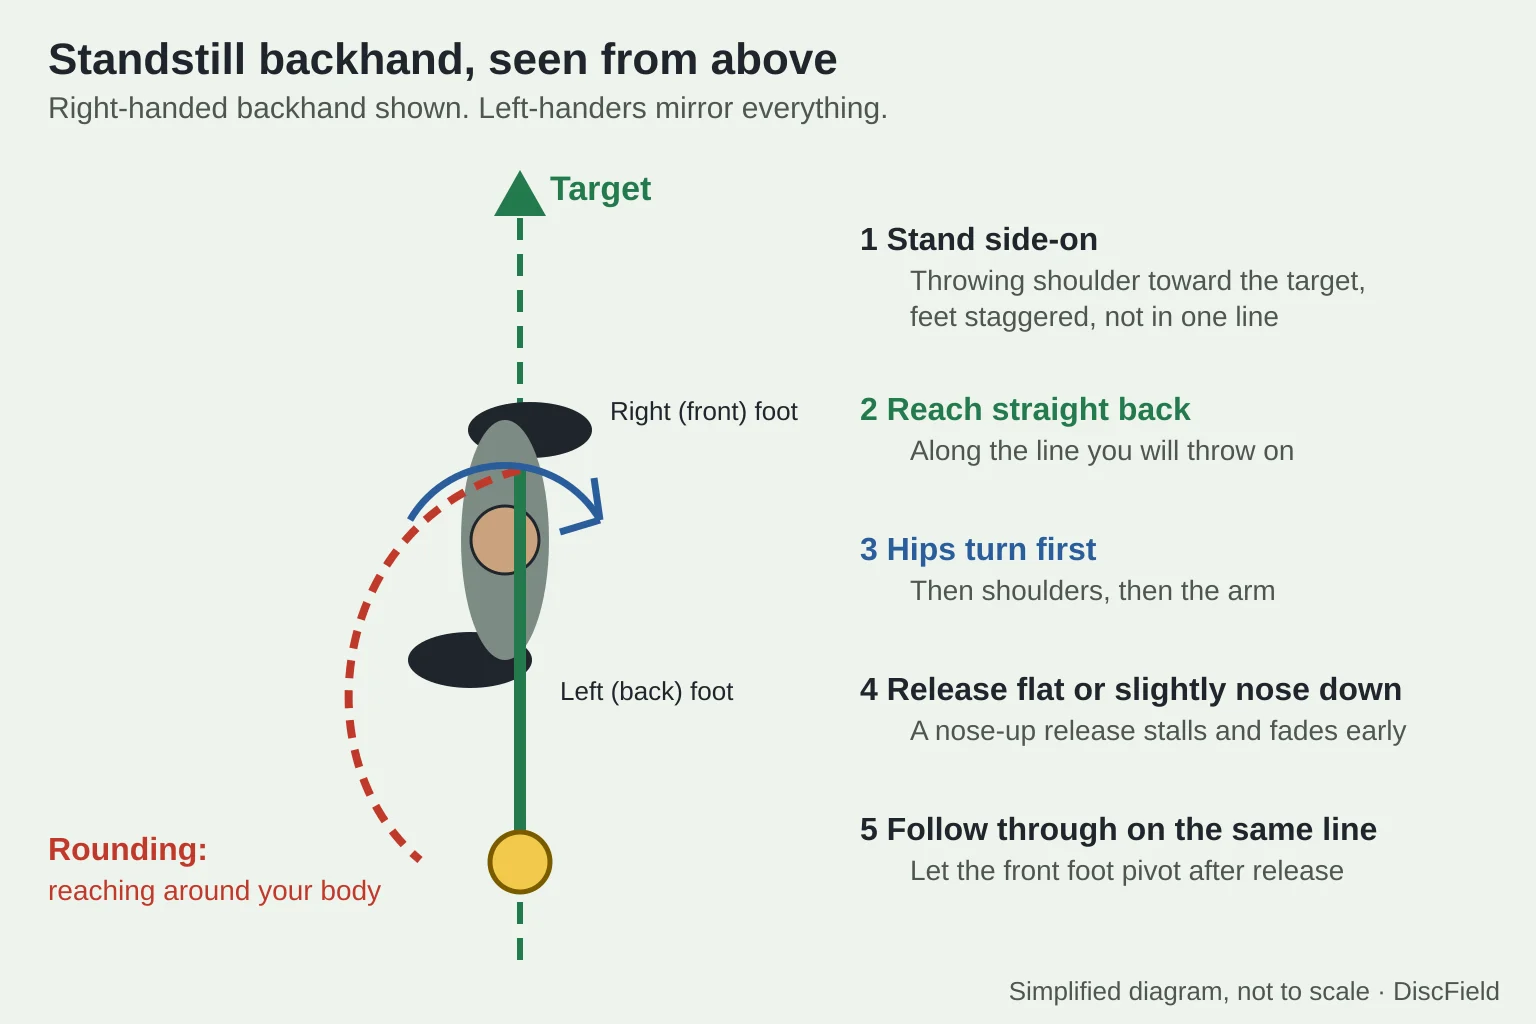
To throw a disc golf backhand, start without a run-up. Stand side-on with your throwing shoulder toward the target, hold the disc in a power grip and reach straight back along the line you want to throw. Then turn your hips toward the target before your arm pulls through. Release the disc flat or slightly nose down, and let your arm follow through on the same line.
That standstill throw is the base for everything else. Once it feels repeatable, you can add a step or a full run-up. This guide walks through each part for a right-handed backhand (RHBH). If you throw left-handed, mirror every left and right.
Which disc to learn the backhand with
Use a putter or a midrange, not a fast distance driver. Innova's article on common throwing errors recommends building form with putters and midranges before moving to faster drivers. Slower discs are easier to throw on a clean line at moderate power, so they show you what your form is doing.
A neutral midrange such as the Mako3 works well, and so does a throwing putter you already own. Our guide to putting and throwing putters explains the difference. If you are choosing your first discs, the first-bag guide keeps it to two or three.
How to throw a backhand step by step
1. Grip
Start with a power grip: thumb on top of the flight plate, four fingers curled under the rim with their pads against the inner rim wall. For short, soft throws you can try a fan grip instead. Our disc golf grips guide shows both with illustrations.
Hold firmly enough that the disc does not slip as you pull, but not so tight that your forearm tenses up.
2. Stance
Stand side-on to the target. For a right-handed backhand, your right shoulder points toward the target, and your right foot is the front foot.
Do not line up your back foot, front foot and the target in one straight line. Innova's guide to longer backhand throws explains that a straight-line setup keeps your hips from rotating fully. Set the front foot a little in front of and offset from the back foot, so the hips can turn through the throw.
3. Reach back
Bring the disc straight back along the line you want it to travel, keeping it roughly at chest height. Turn your shoulders away from the target as you reach.
The common mistake here is rounding: reaching around your body instead of straight back. Innova's throwing-errors article says rounding usually starts in the reach-back. Its suggested fix is to reach toward the back corner of the tee pad on the side opposite your throwing arm.
4. Turn the hips, then pull through
Start the throw with your hips turning toward the target. The shoulders follow, and the arm comes last, pulling the disc across your chest close to your body. Innova calls the opposite pattern an "all arm" throw, where the legs and core add little. Its advice is to rotate through the shot with the hips rather than pulling harder with the arm.
Keep the effort smooth. Innova also recommends getting smooth, well-timed throws before adding power. A comfortable throw that leaves on your line teaches you more than a hard one that wobbles off it.
5. Release angle
Let the disc go flat or slightly nose down. According to Innova, nose-up throws tend to stall, lose distance and fade early. If your throws climb and then drop hard to the left (for RHBH), check the nose angle first. The fix Innova suggests is to exaggerate the nose-down angle in your grip before you start the throw.
The tilt of the disc matters too. For a right-handed backhand, a disc released with its outside edge tipped down (hyzer) tends to curve left, and one tipped up (anhyzer) tends to curve right. An understable disc released on hyzer can still turn up to flat; our hyzer-flip guide shows how to use that on purpose.
6. Follow-through
After the disc leaves your hand, keep your arm moving on the same line as the throw. Innova links a wobbling disc to off-axis torque, often from rolling the wrist at release, and says a follow-through along the throwing line reduces it. On hyzer shots, it adds, the follow-through should continue upward.
Let your front foot pivot as your body turns after the release. Innova's backhand article recommends this pivot to take stress off the knee.
Common backhand problems and fixes
| What you see | Likely cause | What to try |
|---|---|---|
| The disc wobbles in flight | Wrist roll at release (off-axis torque) | Follow through on the same line as the throw |
| The disc leaves your hand off your intended line | Rounding in the reach-back | Reach toward the back corner on the side opposite your throwing arm |
| The disc climbs, stalls and fades early | Nose-up release | Tilt the nose down slightly in your grip before you throw |
| The throw feels weak even at full effort | All-arm throw | Turn the hips first and keep the arm relaxed |
| The disc turns hard right and crashes (RHBH) | A disc that is too understable for the throw, or an anhyzer release | Try a more stable disc or a flatter release |
| The disc fades left almost right away (RHBH) | A very overstable disc, a hyzer release or not enough speed | Try a less stable disc at the same effort |
The last two rows depend on the disc as much as on your form. Our guide to understable vs overstable discs explains how stability changes the flight, and the flight-number guide shows how to read turn and fade.
When to add a step or an X-step
Add footwork only after the standstill throw goes where you aim most of the time. Start with a single step: begin with your weight on the back foot, step onto the front foot and throw as it lands.
The X-step is a common run-up from the tee. Innova's X-step handout describes the back foot crossing behind the front foot during the approach, with the hips leading and the shoulders and arm following. Innova puts the emphasis on timing. Its backhand article names throwing before the front foot has fully planted as one of the most common causes of lost distance, and suggests reaching the top of your reach-back as the front foot lands.
A simple backhand practice session
- Pick an open field and a clear landing target 30 to 50 feet away.
- Throw ten standstill backhands with a putter at an easy effort. Watch only whether each disc leaves on your line.
- Throw ten more with your midrange. Note the most common miss: wobble, off-line, or early fade.
- Choose one fix from the table above and use it for the next ten throws. Change one thing at a time.
- Move the target back only when most throws land near your line.
For a fuller session that mixes putting, approaches and drives, use our 30-minute practice routine. The terminology page explains words such as hyzer, anhyzer and RHBH. For a throw that curves the other way, see our forehand guide.
Innova's throwing-errors article, backhand distance article and X-step handout were checked October 7, 2026. The steps above are a common way to learn the throw, not the only correct form. Expect to adjust them to your body and any coaching you receive.